STEAM Based Flashlight Fun
3 Ways to Use Flashlights for STEAM
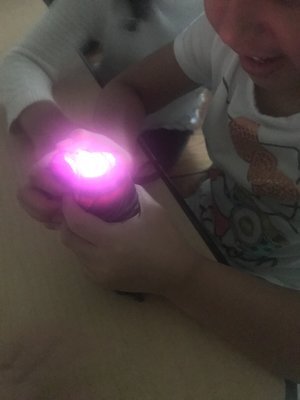
Flashlights can be a super fun (and easy!) learning tool for preschoolers to use to explore different STEAM concepts. They can also be a useful substitute for a light table, which can be costly. There’s a certain “magic” for children as they try to touch, grab, and jump for the light. There are plenty of activities that a flashlight can be added to, to create a new and exciting element. You can use the 3 below to get your feet wet with using light for STEAM purposes.
With any of the below activities, you’ll want to begin by introducing the flashlight to the children. Start by dimming the lights (safety first! And always warn young children before doing so!) and turning the flashlight on. Ask the children what they see. Very young learners might have never seen a flashlight before, while older pre-k students will be glad to explain what it is. Hypothesize what will happen when holding the light on different objects or surfaces, for example, the wall, carpet, chair, window, table, toys, or bookshelf. Then, shine the flashlight on the objects and encourage a descriptive discussion.
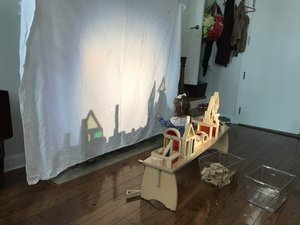
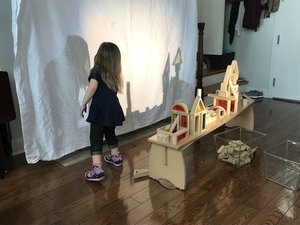
1. Shadow Study
Use magnet tile blocks, wooden or plastic blocks for building. Encourage children to create tall and low structures, and structures of different width and length, shapes, and colors. Backlight the structures they’ve built by standing a few feet back, and shining the light from a low angle to cast a shadow on the wall. Discuss how the size, shape, or color of the structure affect the shadow. Repeat the same with a child’s body, hands, arms, etc, or anything else you can find in your home. What do the children want to use with the flashlight? Encourage an open discussion using predictions, guesses, and opportunities for creativity.
2. Centers
Centers are a teacher favorite for encouraging independent play and discovery. Use a large bowl or box to create your flashlight center, which can be switched out daily, weekly, or monthly, depending on your child’s age and ability. Try to follow your child’s lead for things to include. For example, if you’re talking about the color red, you could include red paper, red blocks, red natural materials, red gems, etc. Reflective and shiny items are also a wonderful addition to this center, like small plastic mirrors, or old CD’s. Children will enjoy testing the light and watching rainbow reflections bounce off of them!
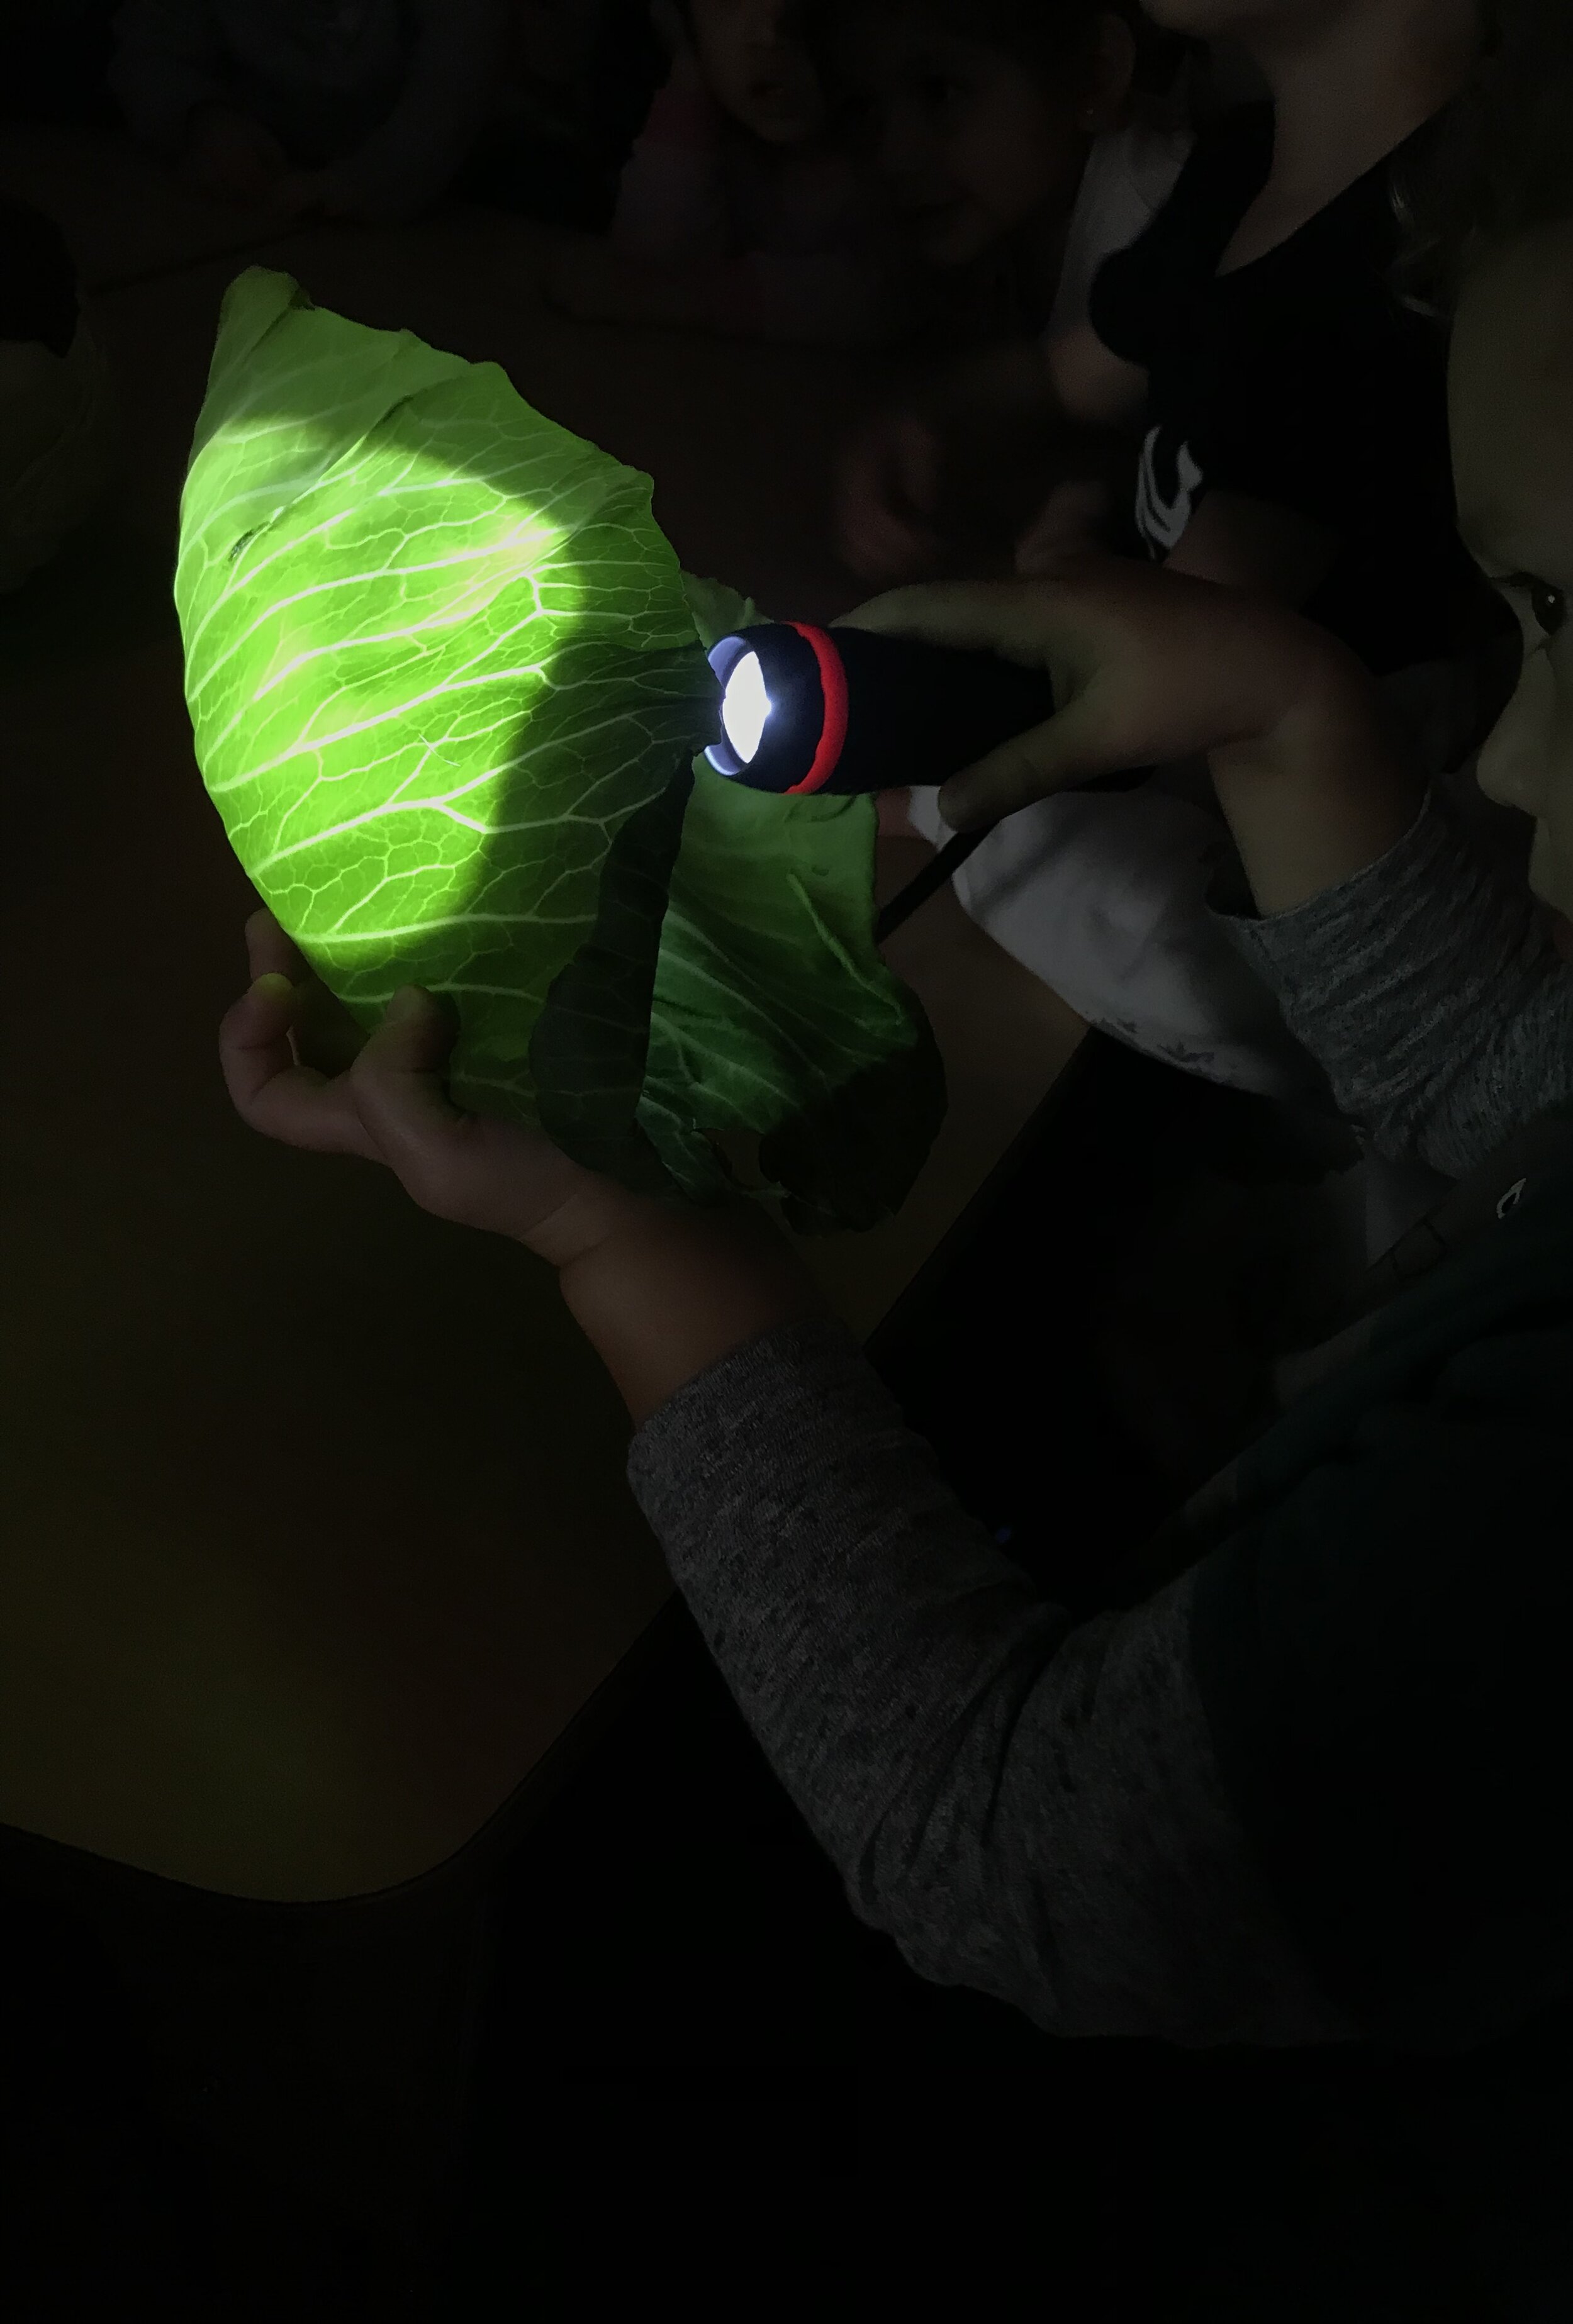
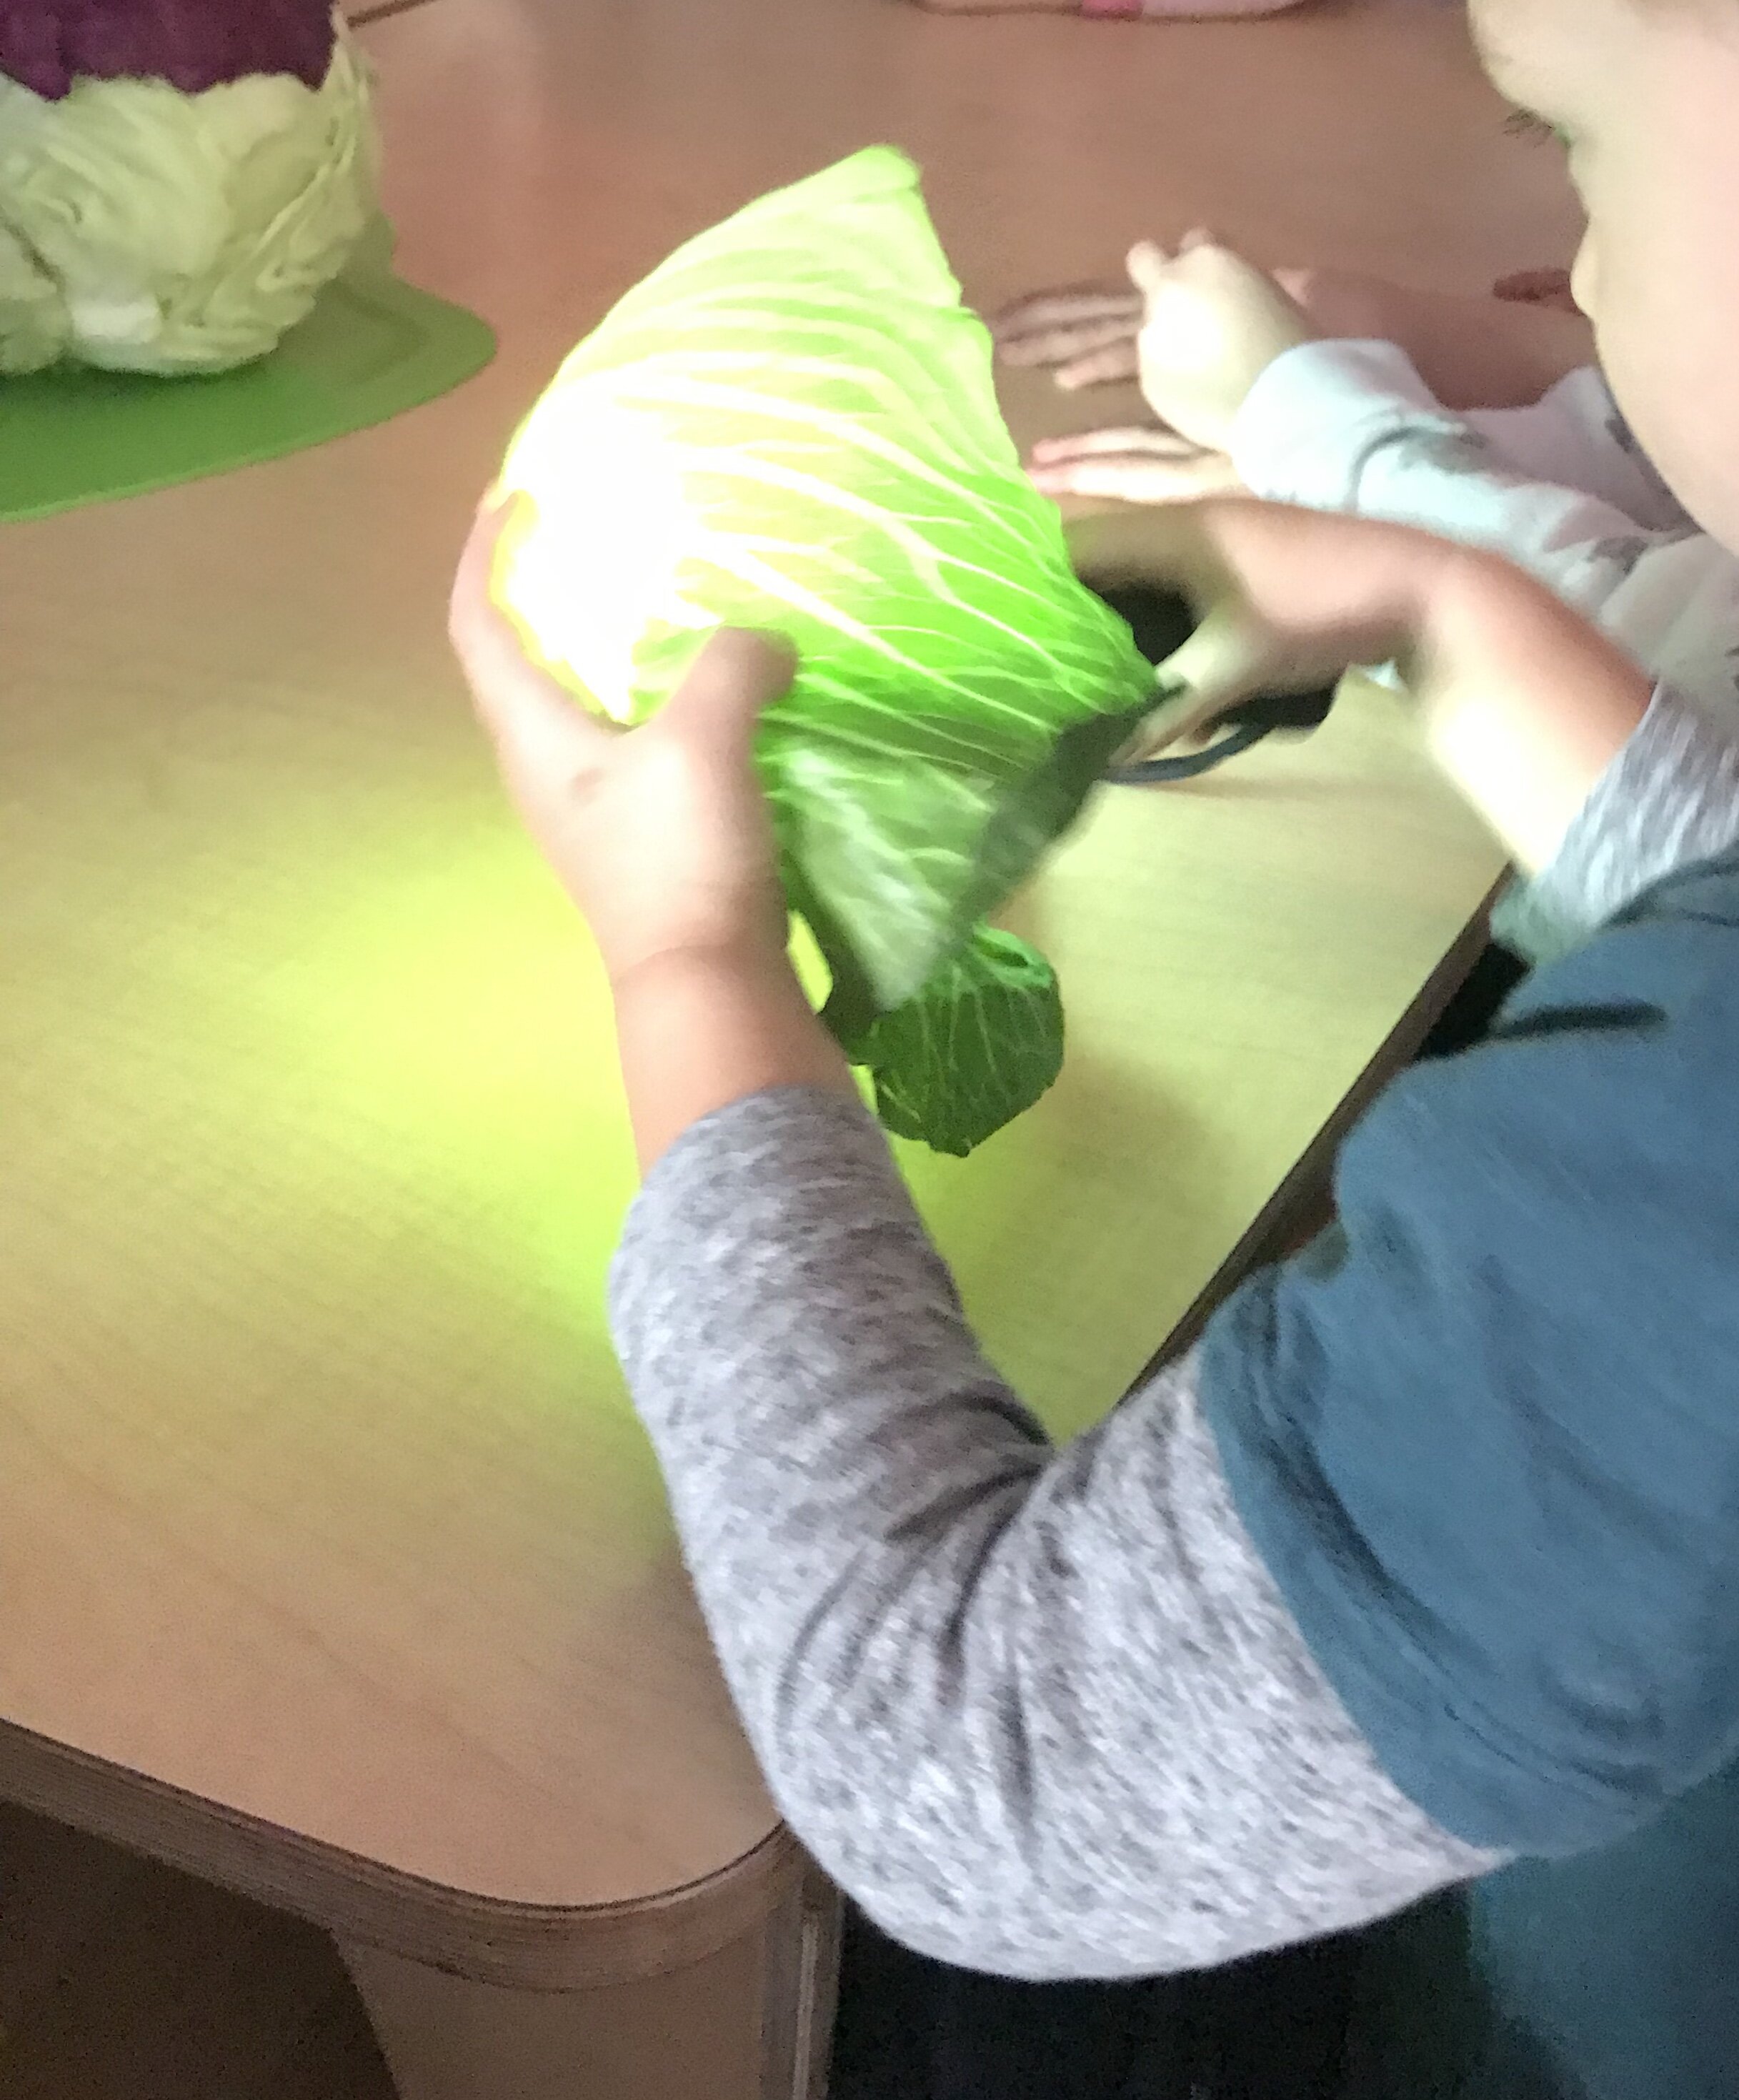
3. Nature Study
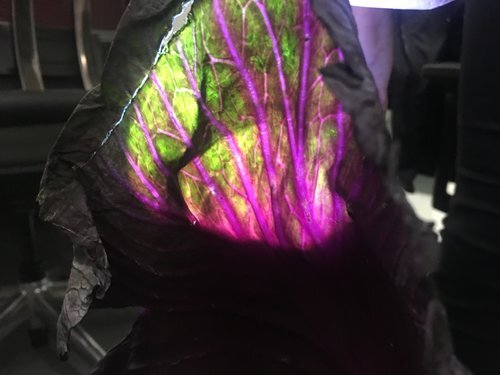
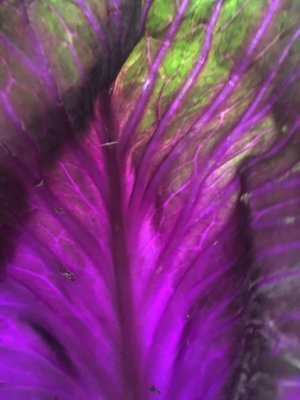
Mixing natural materials with flashlights provides an excellent opportunity for comparing and contrasting. Items such as leaves, vegetables, flowers, herbs, soil, sand, or pebbles can come alive with different colors when examined with a flashlight. Additionally, using a flashlight opens a door for age appropriate biology lessons. For example, using purple cabbage leaves with a flashlight can become an entire activity within itself. Children will be able to notice that without the flashlight, the purple cabbage appears to be just one color, however with a flashlight shone behind the cabbage leaf, they’ll be able to clearly see vibrant purple, pink, and even green and yellow tones. Older children will enjoy comparing the veins on their hands and wrists which you can help point out, and comparing them to the veins in the cabbage (or any other) leaf! Recycle old water bottles and fill them with water, acorns, rocks, leaves, etc. Children can shine the light through the bottle and observe/explore. Natural items can be seasonal, such as pine or evergreen in the winter, brown and orange leaves in the fall, or fresh greenery in the summer.
Check out our free parent download containing 30+ hands on activities for you to engage your children, with STEAM based seed to table activities.
Give our suggestions a try, and let us know what you think in the comments below! Don’t be afraid to pass along and share with friends and family. The healthier we all are, the better!